This is one of the unofficial guides for Sling. This blog post is for Windows users and for beginners.
This tutorial assumes that you have:
- Microsoft Windows (10 or better)
- At least 8 GB of RAM
- At least 50 GB of hard disk space
- sling standalone version 7 (version 8 does not work!)
This guide follows the original blog post in https://sling.apache.org/documentation/tutorials-how-tos/46-line-blog.html. Please refer to the original tutorial. This guide only acts as a supplement.
Step 0: Start, Configure and login to Sling
The easiest way to create a content in Sling is to actually copy and paste the actual code in the 46-line blog in the official Sling web site.
To be able to do the steps in the tutorial web site, you must have the following:
- SVN Subversion for Windows
- Maven for Windows
Once the above-listed software has been downloaded and installed into your Windows PC, we can now proceed.
Install the optional OSGi bundle
The first step is to install the org.apache.sling.samples.path-based.rtp bundle. This is done by checking it out from the SVN repository. Using the command prompt, go to your arbitrary target directory, in my case, the working directory is
C:\workspaces\sling_workspace.
Execute the following command:
svn checkout http://svn.apache.org/repos/asf/sling/trunk/samples/path-based-rtp/
You should get the same output as the one shown below:

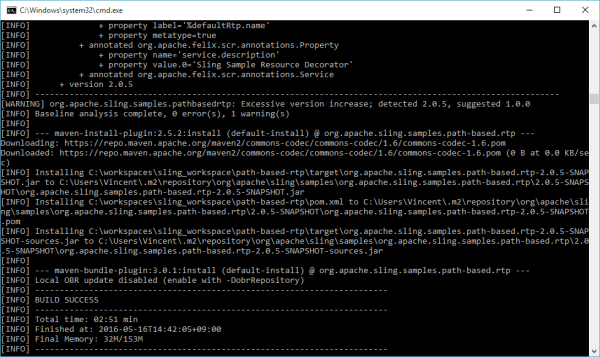
Once you are done, you need to build the OSGi bundle. This is where Maven comes in. At the command prompt, go to the path-based-rtp folder, then execute the following command:
maven install
This command will download several files to your Maven repository and build the path-based-rtp. You will see several messages and eventually, if nothing goes wrong, you will be able to see the following:
Once done, the next step is to install the OSGi bundle.
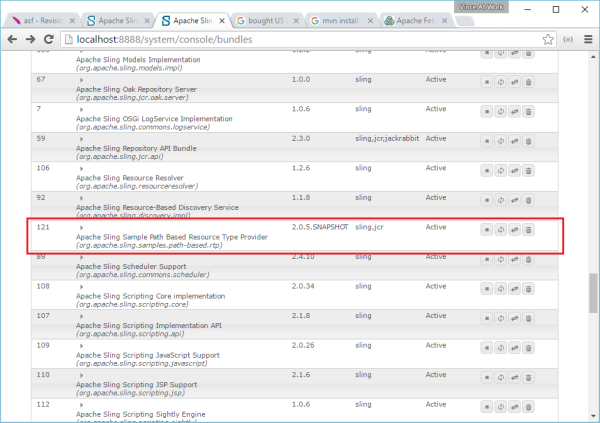
To install the OSGi bundle, you need to navigate to the Apache Sling Bundle Console (http://localhost:8888/system/console/bundles) and scroll to the end of the page and click Install/Update

If you are using Google Chrome, click Choose File. Go to the path where the org.apache.sling.samples.path-based.rtp is installed. In my case, it’s in in C:\workspaces\sling_workspace\path-based-rtp and go to the target folder. From there, choose org.apache.sling.samples.path-based.rtp-2.0.5-SNAPSHOT.

Since we want the OSGi bundle to be loaded now, we should check the Start Bundle check box. If you want to refresh the list of bundles, tick the Refresh Packages checkbox. Then click Install or Update.

To confirm whether the bundle was indeed installed and started, you should search for the path-to-rdp in the page, and be able to see the bundle and it’s status as Active.
From then, we can now proceed with Step 1.
Step 1: Creating content
For absolute beginners using Microsoft Windows 10, you can only do this by mounting a WebDAV drive to your computer. But before these steps can be done, modifications to the system registry should be done. This is because the Sling server in your computer does not use basic authentication for WebDAV.
Modify the Registry
The steps are as follows in order to modify the WebDAV settings for Windows:
- Open the Registry Editor by typing regedit at the search box.
- Navigate to the following location in the registry:
HKLM\SYSTEM\CurrentControlSet\Services\WebClient\Parameters
and set the value of BasicAuthLevel to be 2.
- Click OK
- Restart your PC.
Accessing the Sling installation via WebDAV
The steps are as follows:
- Open File Explorer.
- Go to This PC
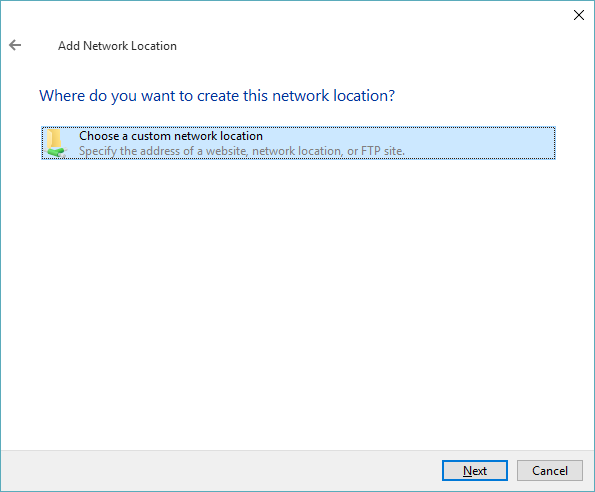
- Right click at any blank space and click Add a Network Location

- Click Next and choose Choose a custom network location and click Next
- At the next screen, enter http://localhost:8888/ as the Internet or network address and click Next.

- At the next screen, name the network location by typing at the appropriate field. In my case, I named my network location as Sling@localhost_p8888. This indicates that this is the Sling mount at the current computer connected via port 8888. Click Next.

- Click Finish at the last page.

Once you’ve added the WebDAV mount to your Sling installation, you will be able to see the following screen:

You will be able to create files, drag and drop like any other normal file in Windows.
The easiest way to create content is to use an HTTP POST request. There is a code in the Sling 46-line blog code. The alternative instructions are written below.
- Using your favorite text editor (such as Notepad++), copy and paste the code in Step 1 of the tutorial. Save it to the WebDAV location you created earlier: /apps/blog/. Save it as blog.esp

- Once saved, you can see the file in the file Sling explorer at localhost:8888/.explorer.html

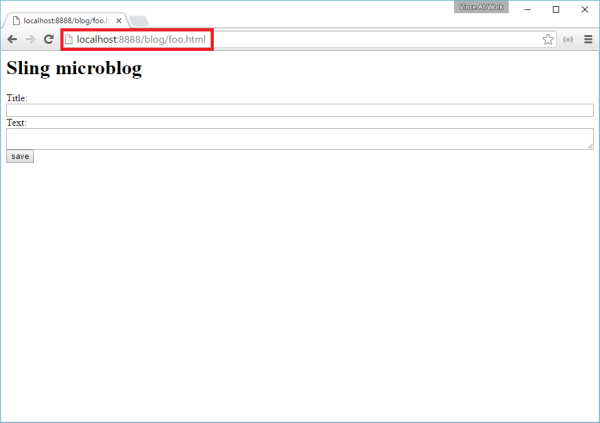
- To view the page, just go to http://localhost:8888/content/blog/*.html. The page can be seen below:

The original tutorial will ask you to type foo as the Title and any text for Text. Hitting save will refresh the page and will show you the same page, but this time, the URL displayed at the address bar has changed from *.html to foo.html:
Step 2: Where’s my content?
(Still being written…)

